The project
- This project is made with the display panel from the Cabletron MT-800 Multiport Transceiver Unit (MAU).
- This MAU was used to connect the computers in the computer room DataMidt to the network before it was replaced when we changed the connections to be using microMAUs and TP cables.
- The project is quite simple, connect the panel to an Arduino board and make it turn all the LEDs on and off.
Hardware
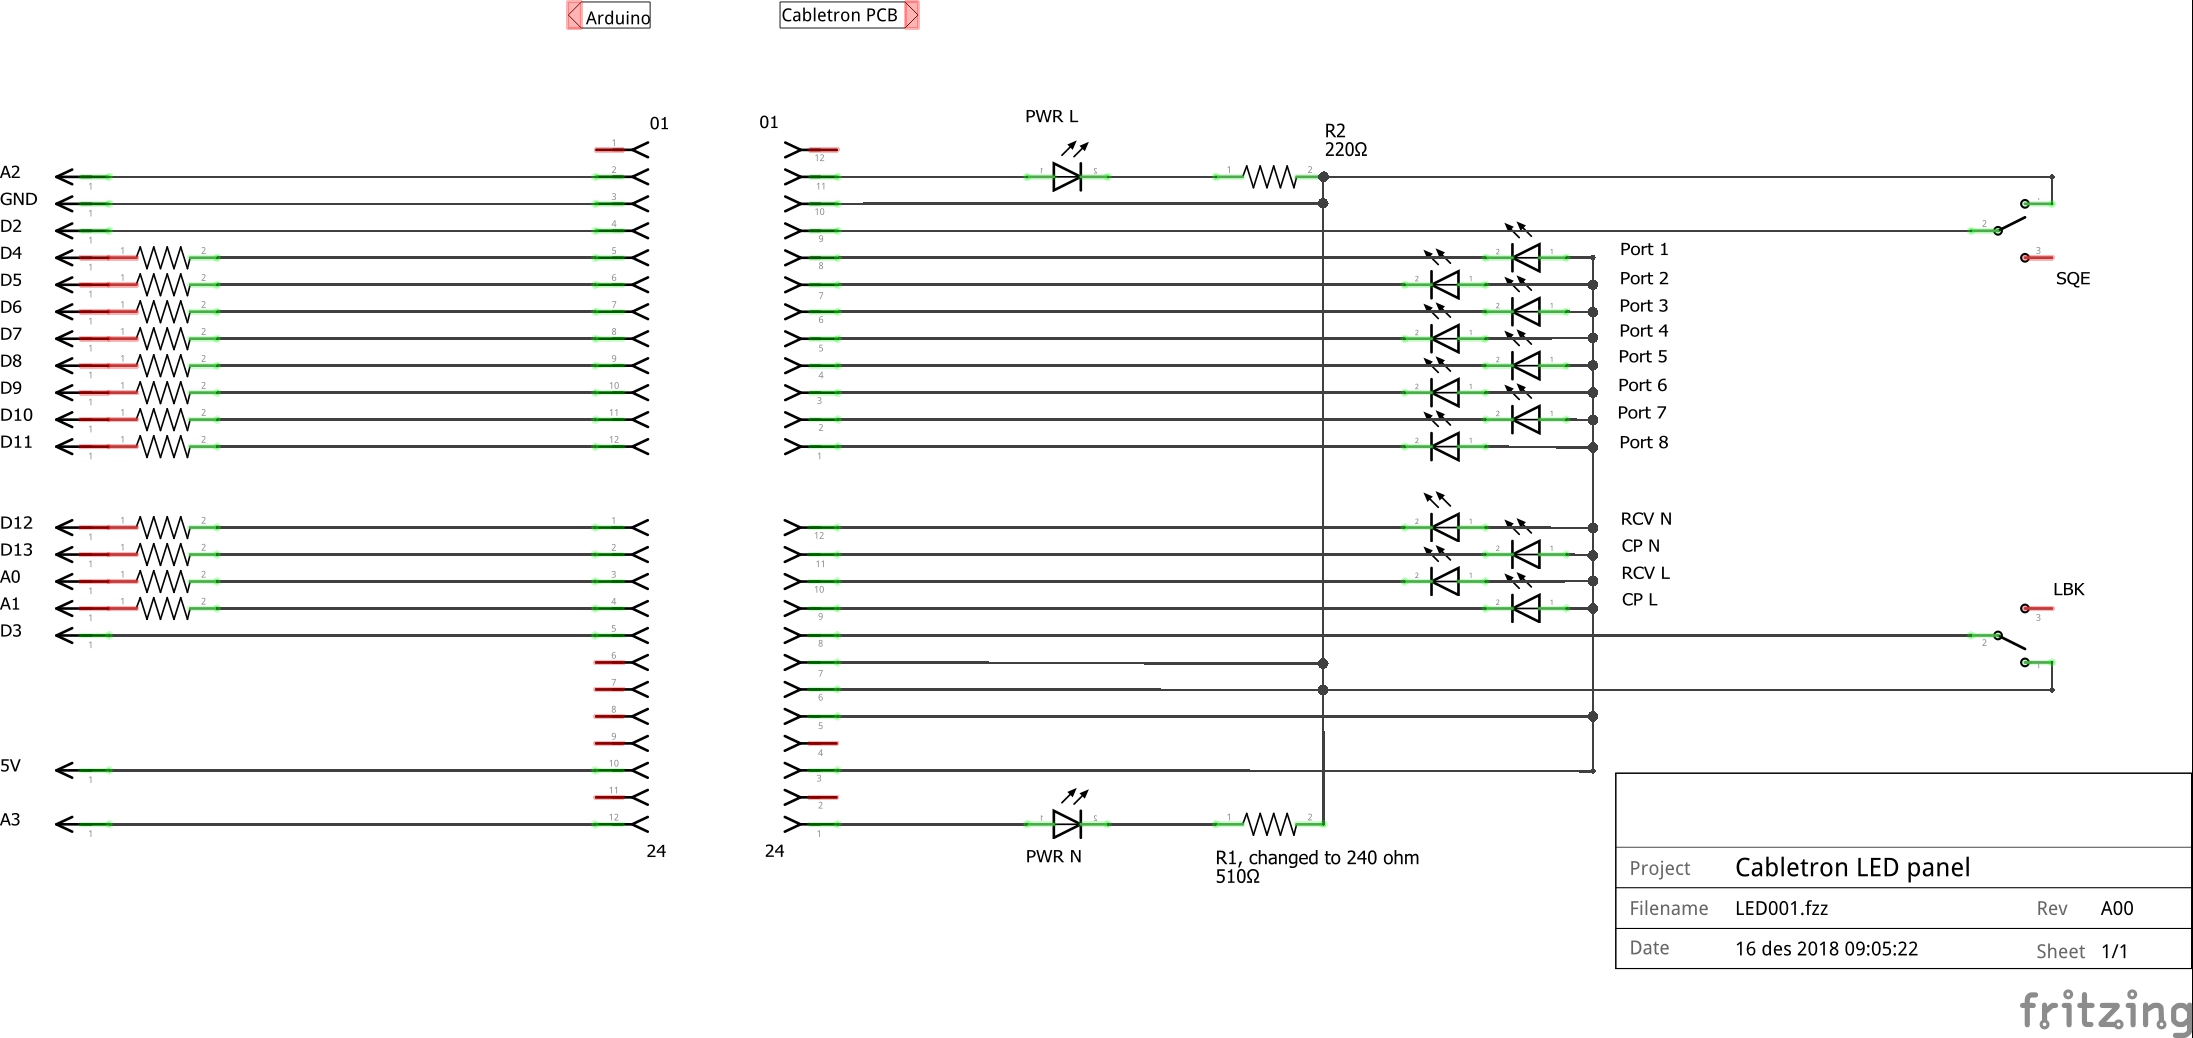
- We connect each of the 14 LEDs to their respective Arduino output ports.
- We connect the two small switches to two Arduino input ports.
- The LEDs can not be connected directly to the ports, but through a 240 Ω current limiting resistor.
The two green PWR LEDs already have a resistor on the PCB board, 220 Ω and 510 Ω.
The resistor value 510 Ω is too large for our 5V Arduino environment so I replace it with one 240 Ω.
This LED was probably connected directly to the Network AUI port, pin 13 (+12 volt).
- And at last, we need to connect the ground wire for PWR LEDs and switches, and +5V for all the other LEDs.
Software
- With a small program for the Arduino board, I can now either turn the LEDs on and off manually, automatically in a sequence or randomly.
- This program can be downloaded and uploaded to the an Arduino board using Xloader.
- After downloading you can connect to the Arduino board using f.ex HyperTerminal.
- The Arduino program has the following commands:
- ax - Auto run mode, where x is l (Lamp), r (Random) or s (Sequence).
- l - Lamp test, turns all the LEDs on and off.
- r - Random test, turns all the LEDs on and off in a random fashion.
- s - Sequential test, turns all the LEDs on and off in a sequence.
- cx - Toggles the two red CP LEDs, where x is n (Network) or l (Local).
- h - Display the help screen.
- ln - Turns all the LEDS on or off, where n is 0 (all off) or 1 (all on).
- pn - Toggles one of the eight green Port LEDs, where n is 1..8.
- px - Toggles the two green PWR LEDs, where x is n (Network) or l (Local).
- R - Reset the Arduino board (warmstart).
- rx - Toggles the two yellow RCV LEDs, where x is n (Network) or l (Local).
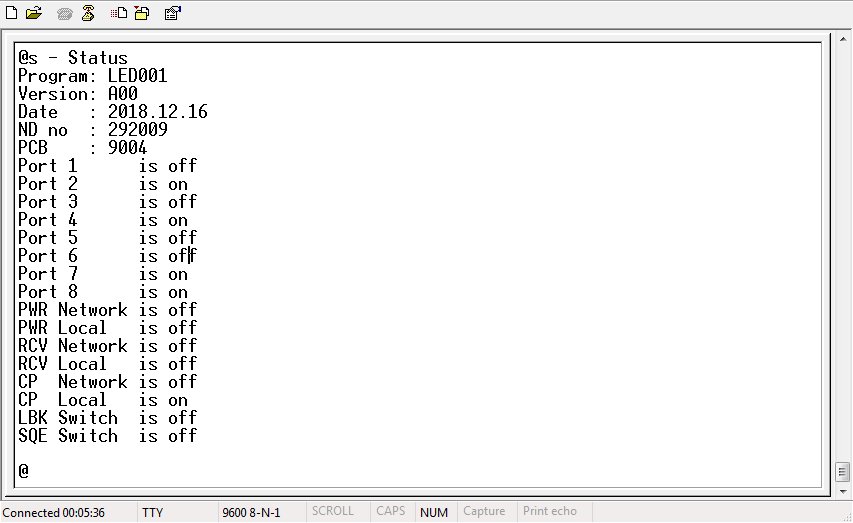
- s - Print the current program and LED status.
- The two small switches LBK and SQE also controls the two red CP (Network, Local) LEDs.
Download
| ND no | Product | Language | Release | Title | Download | Files | Size | Original | Type |
|---|
| 292009.A00 | Arduino | EN | Dec. 2018 | LED001 |  | 1 | 7.6 KB | Yes | SW |
Version history
- Hardware (PCB 9004)
- A00 - 2018.12.16 - Arduino Uno interface board
- Software
- A00 - 2018.12.16 - First released version
FAQ
- Do you have a Cabletron LED board that I can buy?
- No, you must find an MT-800 (or similar) and pick out the LED board yourself.
- Can I buy an Arduino Uno and/or Arduino prototype board from you?
- Yes, but IT IS much cheaper to find and buy it on the internet.
- Can you build or help me build this project?
- No, you are totally on your own and YOU have to build it yourself.
- Can I have the Arduino source sketch so I can modify it myself.
- No, you can NOT. You have to write your own sketch.
|
 Component side
 Solder side
 Front panel
 Replaced resistor and ribbon cable
 Hooked up to the Arduino board
 Random auto mode
 Snapshot from the Status command
 Circuit diagram
|
 1.6 - Norsk Data projects

 1.6 - Norsk Data projects


